Circular Afghan

Circular Afghan

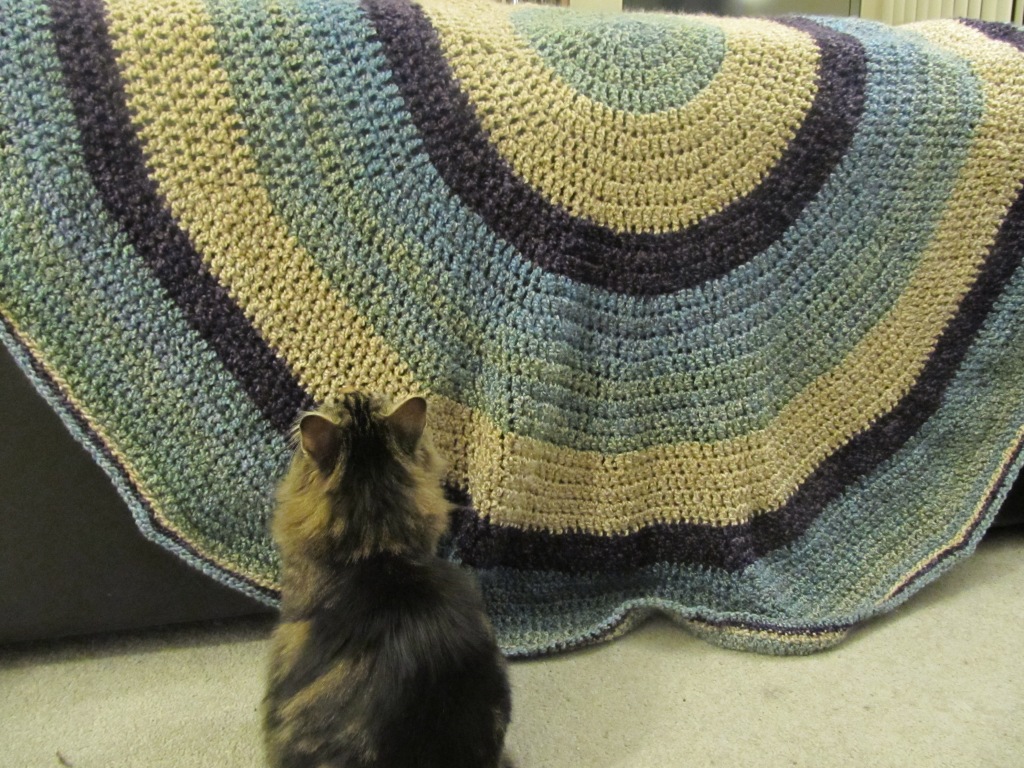
A couple of months ago, there was a big sale on homespun yarn. I love how soft this yarn is, so I bought about a million balls to make an afghan at some point. Well my basket (it’s actually a laundry hamper — that’s how much I bought) was taking up too much room so I decided it was about time to undertake my 3rd afghan project. This one worked up really quickly (well, relatively speaking anyway). I used this pattern for a circular afghan from Lionbrand, with 5 rows of Regency, 5 rows of Roccoco, 3 rows of Baroque, and 3 rows of Windsor (and repeated until I had 37 rows). This blanket is incredibly warm, almost too warm! But then again, living in Northern Canada, sometimes that’s necessary.

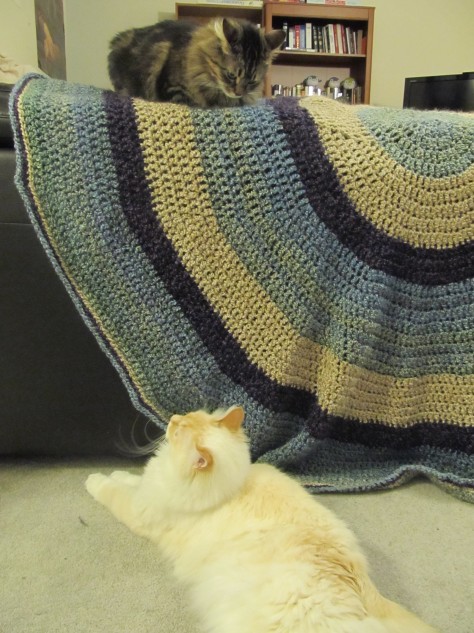
The cats seem to like the afghan too. I took a dozen pictures and there’s at least 1 cat in every one of them. Silly kitties!

Afghan 3k

Marian’s Neck Warmer

Neck Warmer2

Well it’s that time of the year again, and I’m up to my neck in crocheted Christmas gifts (and textbooks… but I won’t get into that). I wanted to make a scarf/cowl/neck warmer for my boyfriend’s mom and I came across the ‘Button Up Neck Warmer’ pattern on RedHeart.com.  It seemed perfect — practical and warm, without all the extra material of a scarf. This pattern promised it was quick and easy… well they got it half right! It was easy but it sure as hell wasn’t quick! This thing took me hours upon hours!! I’ve made full-length scarves in the time it took me to do this stupid thing! Now that it’s done I’m pretty happy with how it turned out, I just wish I’d made it a touch longer to allow for more ‘breathing room’ (I did the large size to begin with, but would probably have added an extra 5-10 stitches in the foundation). I hope she likes it.

Neck Warmer1

Stitch Markers

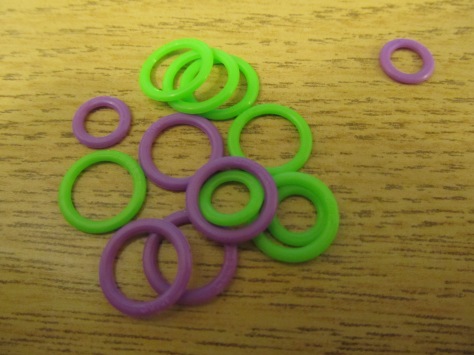
I taught myself how to crochet a little over a year ago. It was pretty rough at the start and I made a lot of really stupid mistakes. One of those mistakes was buying the wrong supplies. I knew I needed stitch markers, but I didn’t really know what those were or how/why they’re used. So I went to the store and bought some stitch markers…

Stitch marker 1

I had no idea that these were knitting stitch markers and really wouldn’t work for my crochet projects. I tried everything I could think of to use these damn things. They’re slightly flexible so I tried squishing them and sliding them under my stitches. I knew they shouldn’t loop under my stitches because I wouldn’t be able to get them out without cutting them, but I tried anyway. Needless to say, it was a very frustrating process and looking back on it I have to laugh at myself for being such an idiot.

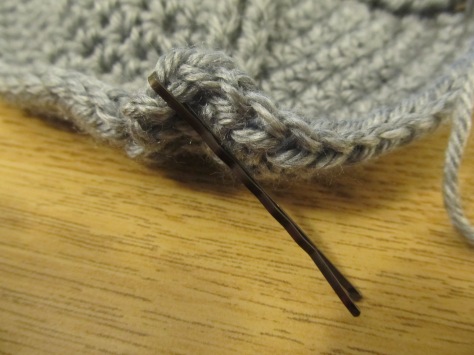
After that, I searched high and low for something I could use instead, when I came across my collection of hair accessories…

Stitch marker 2

I figured I could use bobby pins temporarily until I bought some proper crochet stitch markers. But since then, bobby pins are the only thing I’ll ever use. The plastic nobs on the end keep them from snagging, they’re a little long but generally don’t get in the way, and I have about a million of them lying around! Safety pins haven’t proven to be very safe for me, paperclips catch and snag on my yarn, and pieces of yarn scraps can be fiddly. In the end, I probably saved myself a lot of money by buying the wrong stitch markers…

Stitch marker 3

Extended Single Crochet

Here’s a step-by-step guide to the extended single crochet stitch, as used in my Granite Stitch Scarf. The extended single crochet (esc) is just like the single crochet stitch with an extra step.

1) Insert your hook into stitch and yarn over (just like you would start a single crochet)

Image

Image

2. Draw yarn up through stitch, there are now 2 loops on the hook. (still like single crochet)

Esc 33. Now here’s the “extra step”: yarn over again (still like single crochet) and pull the yarn through the first stitch only (there are now 2 loops on the hook)

Esc 4

esc 5a

4. Yarn over and pull through both stitches

Esc 6

Esc 7a

I used a big hook for clarity, so the finished stitch won’t be this loose if you use the proper hook for your yarn.

Now if you’re alternating between esc’s and ch-1’s, like in my pattern, the next step is to chain 1, skip 1 stitch, and esc in the next — continuing until the end of the row.

Esc 8paint

In this pattern, you always start and finish your row with an extended single crochet, so on the next row (i.e. row 3 of the pattern and all odd rows) you will have 2 esc’s at the start before chaining. In the picture below, the first esc has been done and the black arrows indicate the chain-spaces where the extended single crochet stitches go into.

2nd row 1 Paint

2nd row 3

After a few rows, this is what it should start to look like. Notice that the esc stitches are offset, like mesh, or a checkerboard pattern.

granite pattern

Please let me know if you have any questions or if anything is unclear.

Ferret Coffee Cozies

I had a request to make ferret-style coffee cozies. Since I couldn’t find an existing pattern, I used my regular coffee cozy pattern and added some basic shapes. They came out looking a bit like mice, but that’s better than looking like bears (which is what the first attempts mostly resembled). After a lot of experimenting, this is how they turned out…

Image

Here’s the pattern in US terms:

Materials

Worsted weight cotton* yarn in 3 colours:

A: Main colour

B: White

C: Accent colour (darker than A)

*Note: I recommend using cotton because it won’t shrink or felt when washed, and it won’t melt when heated like acrylic does. You can also use wool but isn’t as easy to wash. The cozies that I’ve made with cotton yarn can go into the washing machine no problem. They’re also technically drier safe too but mine have faded when I’ve dried them so I’d recommend air-drying.

Crochet hooks F, G, H, & I

2 black buttons (for eyes) + 1 pink button (for the nose)

Very small amount of polyester fiberfill (for nose)

Pattern

Cup Cozy

Note: This pattern can be worked in continuous rounds OR with a slip stitch and chain 1 @ the end of each round. I prefer to slip stitch at the end of each row so the colours line up evenly.

With H hook & colour A, ch 25. Join with sl st (don’t twist chain)

With I hook:

Rd 1-3: Sc in each st around (25sts)

Rd 4: Sc in 1st st, [2sc in next, 1sc in each of next 11 sts] twice. (27sts)

Rd 5-6: Sc in each st around (27sts)

Rd 7: Sc in 1st st, [2sc in next, 1sc in each of next 12 sts] twice. (29sts)

Rd 8: Sc in each st around (29sts). Colour change to B (white yarn)

Rd 9: Sc in each st around (29sts)

Rd 10: Sc in 1st st, [2sc in next, 1sc in each of next 13 sts] twice. (31sts)

Rd 11-12: Sc in each st around (31sts)

Rd 13: Sc in 1st st, [2sc in next, 1sc in each of next 14 sts] twice. (33sts)

Rd 14: Sc in each st around (33sts). Finish off. Sew ends in.

Mask

To make the mask, you’re going to crochet an oval. Again, this can be worked in continuous rounds or can be joined at the end of each round. I prefer to join.

With F hook & yarn C (accent colour, Ch 7

Switch to G hook

Rd 1: Sc in 2nd st from hook and in next 4 sts. Sc 3 in the last st. Rotate your piece so you’re now working in the other side of the chain. Sc in the next 4 sts. Sc 2 in the last. Join to 1st sc (14 sts)

Rd 2: Ch 1, 2sc in 1st st, sc in next 4, 2sc in each of the next 3 (i.e. 6 sts), sc in next 4, 2sc in each of the next 2.  Join to the 1st sc. (16sts)

i.e. inc, 4 singles, [inc]x3, 4 singles, [inc]x2

Rd 3:  Ch 1, 2 sc in 1st st, sc in next 5, [2sc, 1sc] x3, sc in next 4, [2sc, 1sc] x2. Join to 1st sc. (22sts)

i.e. [inc, 1] 4 singles, [inc, 1] x3, 4 singles, [inc, 1] x2

Rd 4:  Ch 1, 2 sc in 1st st, sc in next 6, [2sc, 1sc in next 2] x3, sc in next 4, [2sc, 1sc in next 2] x2. Join to 1st sc. (28sts)

i.e. [inc, 1,1] 4 singles, [inc, 1,1] x3, 4 singles, [inc, 1,1] x2

Rd 5:  Ch 1, 2 sc in 1st st, sc in next 7, [2sc, 1sc in next 3] x3, sc in next 4, [2sc, 1sc in next 3] x2. Join to 1st sc. (34sts) Finish off leaving a tail for sewing.

i.e. [inc, 1,1,1] 4 singles, [inc, 1,1,1] x3, 4 singles, [inc, 1,1,1] x2

Nose

Work the nose in continuous rounds.

With I hook and yarn B (white)

Sc 4 into a magic circle

Rd 1: 2sc in each st (8sts)

Rd 2: Sc around (8sts)

Rd 3: [2sc, 1sc in next] around (12sts)

Rd 4: Sc around (12sts)

Rd 5: [2sc, 1 sc in next 2] around (16sts)

Rd 6: Sc around (16sts). Finish off leaving a tail for sewing.

With embroidery floss, sew pink nose onto the end. I used a small pink button for the nose, but you could easily embroider a little triangular nose on too.

You can also try adding a mouth 🙂

Ears (make 2)

With F hook and yarn B (white)

Row 1: Ch 2, 3 sc in 2nd ch from hook. Ch 1 & turn.

Row 2: 2sc in each st (6sts). Ch 1 & turn.

Row 3: [1sc, 2sc in next] across (9sts). Ch 1 & turn.

Row 4: [1sc in first 2 sts, 2sc in next] across (12 sts. Ch 1 & turn. Finish off leaving a tail for sewing.

Assembly

Image

First, sew mask onto cup cozy. Position it so the top of the oval lays across the 2nd to last row of the cozy.

Next, sew on the nose. It should lay almost entirely on top of the mask, but make sure there’s no mask peeking out through the bottom. When there is only a small opening left, add fiberfill and finish sewing to the cozy.

Now sew on the eyes and ears. The base of the ear should follow the curve of the mask without touching the mask.

Enjoy!

Image

Fingerless Gloves

It’s getting pretty chilly where I live, and I’ve been trying out different crocheted glove patterns. I really like this pattern by Crystal Palace Yarns! They’re really warm and comfortable. The only issue I have with them is that they can be difficult to get on and off, especially since single crochet doesn’t provide the most stretchy material.

Image

I made the blue gloves with Martha Stewart Merino in Igloo.

Image

I made the black and green gloves using Bernat Satin in Ebony and Lemon Grass.